


If you run multiple retail stores or a combination of a warehouse and a brick-and-mortar shop, you already know how that works.
One location runs out of a bestseller. Another has the same SKU sitting in the back room collecting dust.
You open Stocky, create a transfer, then jump into POS, then back to Admin to check quantities.
Yep, that workflow is officially over.
In May 2025, Shopify launched a redesigned inventory transfers experience that brings fulfillment and receiving natively into Shopify POS.
We will cover what’s changed, how it works, how to use it, and what’s the better way.
What Changed with Shopify's New Inventory Transfers
Until mid-2025, most Shopify merchants managed stock transfers through the Stocky app. It worked, but wasn’t effective or efficient. Creating transfers in one place and receiving them via a separate POS UI extension meant your store teams were always a few steps behind the system.
The new experience fixes this. Here's what's different:
Note: The Stocky app will stop working entirely on August 31, 2026. If you haven't made the switch yet, now's the time.
Requirements Before You Start
A few things need to be in place before your team can use the new transfer workflow:
- Shopify POS Pro subscription at both the origin and destination locations. The free POS Lite plan doesn't include transfer fulfillment.
- Staff permissions: Each team member needs both the Inventory permission and the Manage transfers permission.
- Shopify POS app version 11.6 or later (required for packing slip printing).
- Multiple active locations configured in your Shopify Admin. If you only have one location, transfers aren't applicable.
- Products must be tracked and active at both the origin and destination locations. Transferring inventory records it at the destination, but it won't be sellable there until the product is activated at that location.
💡Quick check: Go to Settings > Locations in your Admin. Make sure both stores appear as active, fulfillable locations before you create your first transfer.
Steps to Use the New Shopify POS Inventory Transfer Feature
Step 1: Create the Transfer in Shopify Admin
Transfers always start in the Shopify Admin. Your in-store POS teams can fulfill and receive them, but they can't create them from the POS app itself.
- From your Shopify Admin, go to Products > Transfers.
- Click Create transfer.
- Set your origin location (the store or warehouse sending stock) and destination location (the store receiving it). You can leave either blank for external suppliers or offsite locations.
- Add the products and quantities you want to transfer. You'll see current stock levels at the origin to guide your decisions.
- Click Save. The transfer is now in Draft status. Nothing moves yet, and no inventory is reserved.
Transfer Status Cheat Sheet
When you're ready to move the stock, open the transfer and click Mark as > Ready to ship. This reserves the quantities at the origin so they're not accidentally sold or allocated elsewhere while in transit.
Step 2: Fulfill the Transfer in Shopify POS (Origin store)
Once the transfer is in Ready to ship status, your staff at the sending location picks and packs the items. This all happens in the POS app now. No Admin required.
- Open Shopify POS on the device at the origin location. Make sure you're set to the correct location or you won't see the transfer.
- Tap the menu icon and go to Outgoing transfers. You'll see a badge showing how many transfers are pending.
- Tap the transfer you want to fulfill. You'll see the transfer ID, which matches what you created in Admin.
- Tap Create shipment.
- Add items to the shipment using one of these methods:
- Barcode scanner: Tap the scanner icon and scan each item as you pick it.
- Camera scan: Use your POS device's camera to scan product barcodes.
- Manual entry: Tap a product and enter the quantity by hand.
- If you're splitting the stock into multiple shipments (say, half goes out today and the rest next week), you can create separate shipments within the same transfer. Each gets its own shipment ID, like T289-1 and T289-2.
- Once items are packed, tap Move to in transit. Inventory now shows as Incoming at the destination, and the stock is reserved at the origin.
Print a Packing Slip
Before your shipment leaves the building, you can print a packing slip directly from POS:
- Go to Outgoing transfers.
- Tap the transfer > Shipment details.
- Tap Print packing slip.
The packing slip lists everything in the shipment, similar in format to a regular order packing slip. You'll need a connected or AirPrint-compatible printer and POS version 11.6+.
Step 3: Receive the Transfer in Shopify POS (Destination store)
Once the shipment is marked In transit, your team at the receiving location gets a notification. Here's how they accept the inventory:
- Open Shopify POS at the destination location. Again, make sure you're at the right location.
- Tap Products > Incoming transfers.
- Find the transfer by ID (it matches the origin transfer).
- Choose how you want to receive:
- Accept all: Tap Accept all then confirm. Fast and clean if everything arrived as expected.
- Review by shipment: Tap into individual shipments and accept or reject each one.
- Item-by-item: Count and scan each product individually. Best for high-value stock or when you want a precise audit trail.
- If a product arrived short or damaged, use the Reject section to log a different received quantity. You can leave the remaining items in Incoming status and receive them later.
- Once reviewed, tap Save. Inventory updates immediately and the accepted stock becomes available for sale at the destination location.
Important: Once you accept items, it can't be undone in the POS app. Take a moment to verify quantities before tapping Accept.
Handling Partial Shipments and Multiple Batches
The new system is built for the messiness of real-world retail. Not everything arrives at once. A supplier might send 60 units now and 40 units next week. A store-to-store transfer might have to be split across two vans.
Here's how to manage it:
- Multiple shipments within one transfer: Add additional shipments from the Admin transfer page once the transfer is in ‘Ready to ship’ or ‘In Progress’ status. Each shipment gets its own tracking details and can be received independently.
- Partial receiving: If only some items arrived, receive what you have. The remaining quantities stay in ‘Incoming’ status. Your team can repeat the receiving flow when the rest arrives.
- Tracking information: For each shipment, you can add a tracking number, carrier, and expected arrival date from Admin. You can also add a barcode to the shipment so staff can scan it at the door to open the receiving page instantly.
The problem with old transfer tools was that they didn't handle this gracefully. A partial arrival meant a messy workaround. Now it's a first-class part of the workflow.
Common Mistakes to Avoid
- Wrong location in POS: If a staff member is logged into the wrong location, they won't see the transfer. Always confirm the location before looking for incoming or outgoing transfers.
- Product not activated at destination: Even after you receive inventory, products need to be actively listed at the destination to be sellable. Go to the product page in Admin and activate it at the destination location.
- Skipping Ready to Ship: If you move straight to ‘In Progress’ without going through ‘Ready to Ship’, you skip the stock reservation step. That means the stock could be sold out from under the transfer.
- Accepting before counting: It's tempting to tap ‘Accept all’ and move on. But if there's a discrepancy, you won't have a record of it. For high-value SKUs, always count first.
How Prediko Helps You Decide What to Transfer
Shopify's native transfer tool tells you how to move stock. It doesn't tell you what to move, when, or how much.
The gap is that none of the systems are connected by default. Your POS sales data, your online store demand, your warehouse quantities: they're siloed. You end up reacting to stockouts instead of preventing them.
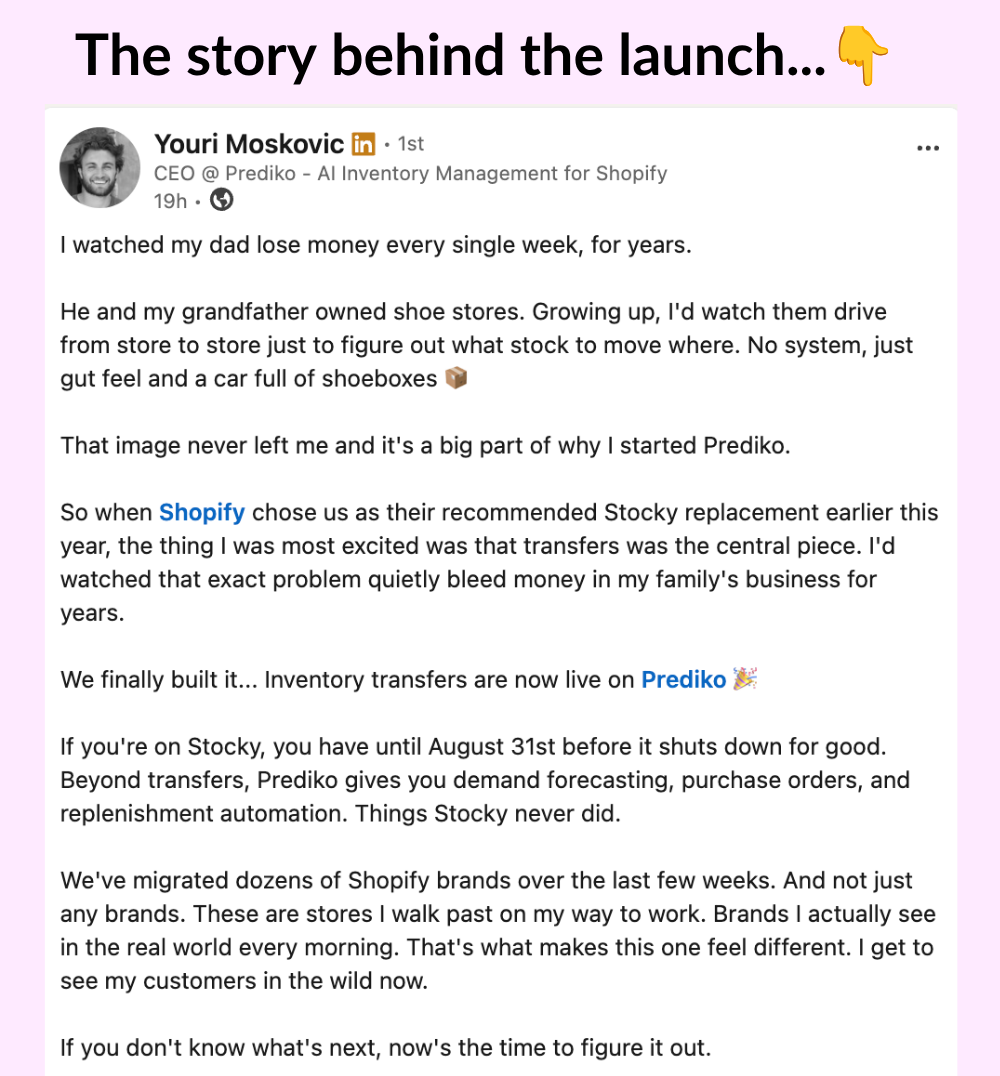
That’s the gap Shopify and Prediko collaborated to fill with Prediko’s inventory transfer feature.
Here's how it works in practice:
1. Real-time visibility across all locations
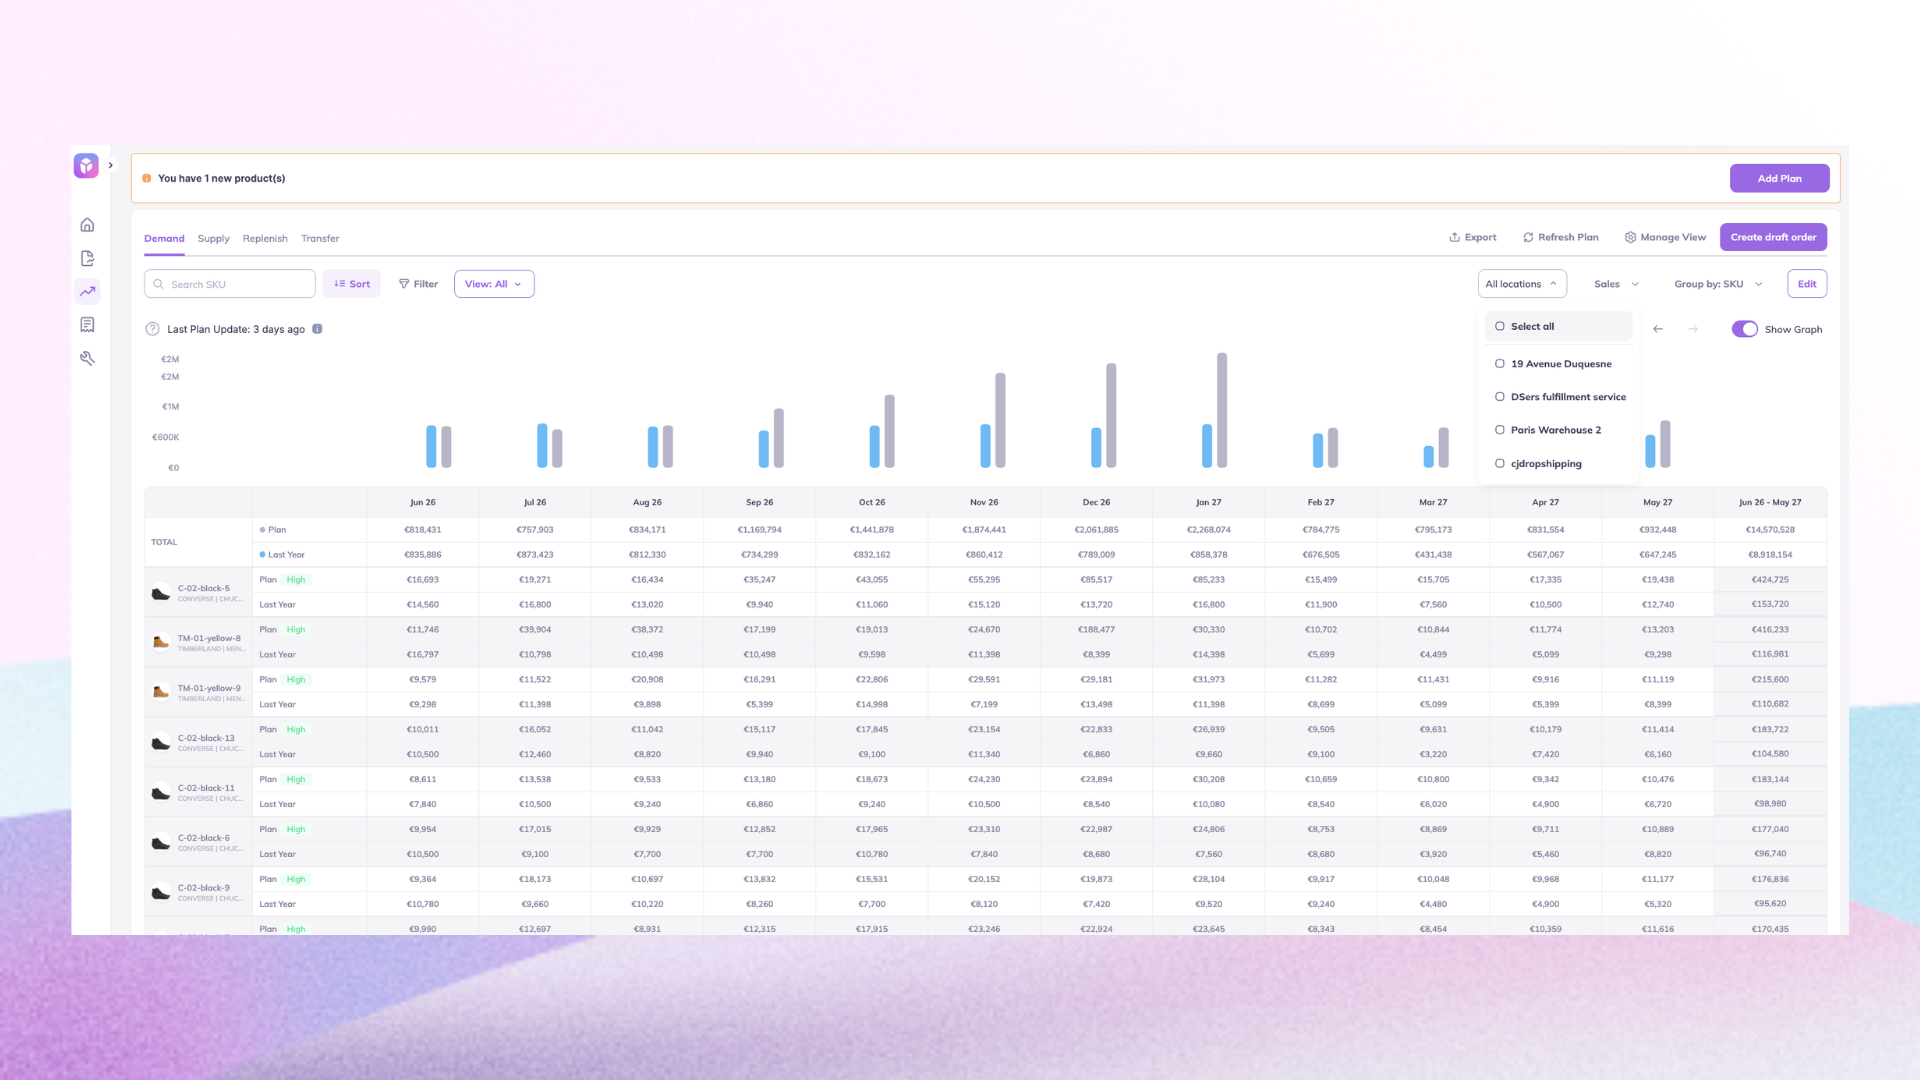
Prediko syncs with Shopify in real time and gives you a single dashboard showing stock health at every location: stores, warehouses, 3PLs. You can see at a glance which locations are at risk of running out and which ones have excess inventory sitting idle.
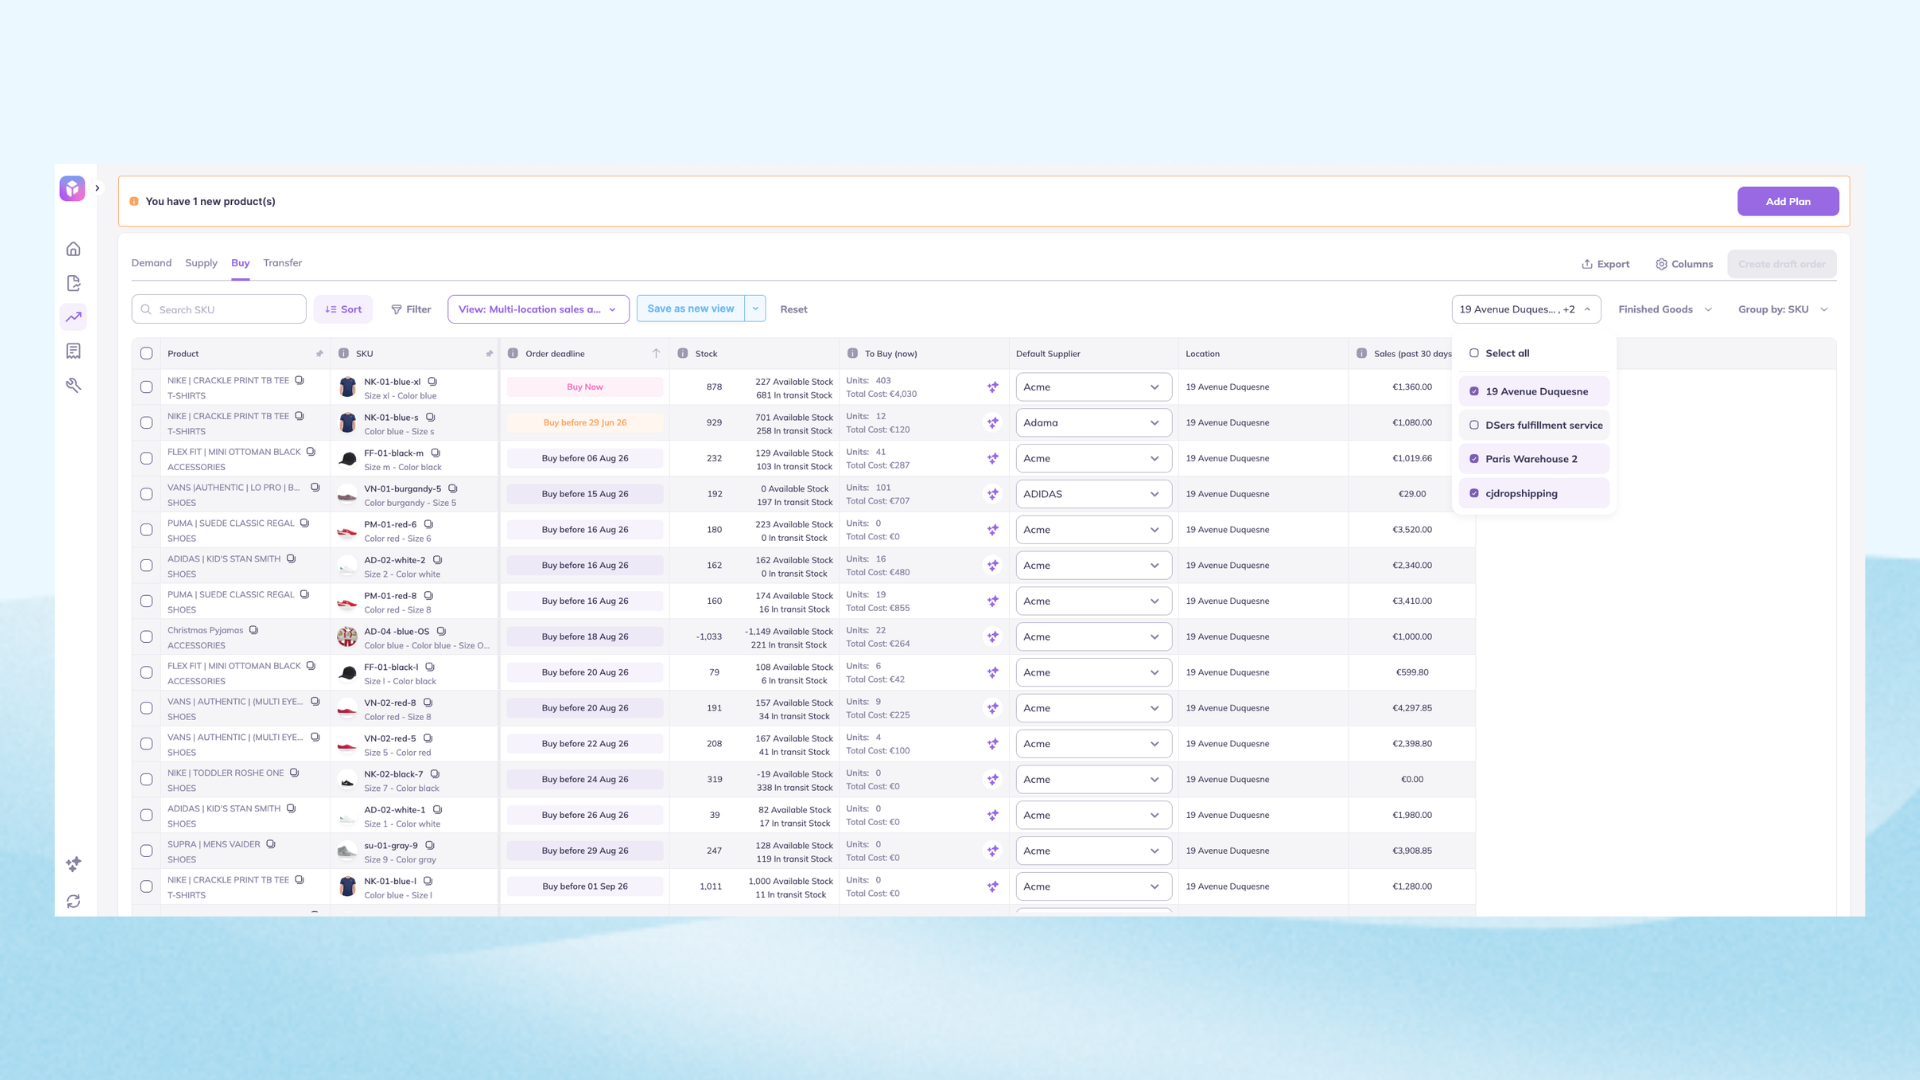
2. AI-powered transfer recommendations
Instead of manually scanning reports to spot imbalances, Prediko flags which SKUs need to move and where. If your Manchester store is 2 weeks from stocking out on a seasonal bestseller and your London warehouse has 300 units collecting dust, Prediko surfaces that before the stockout happens.
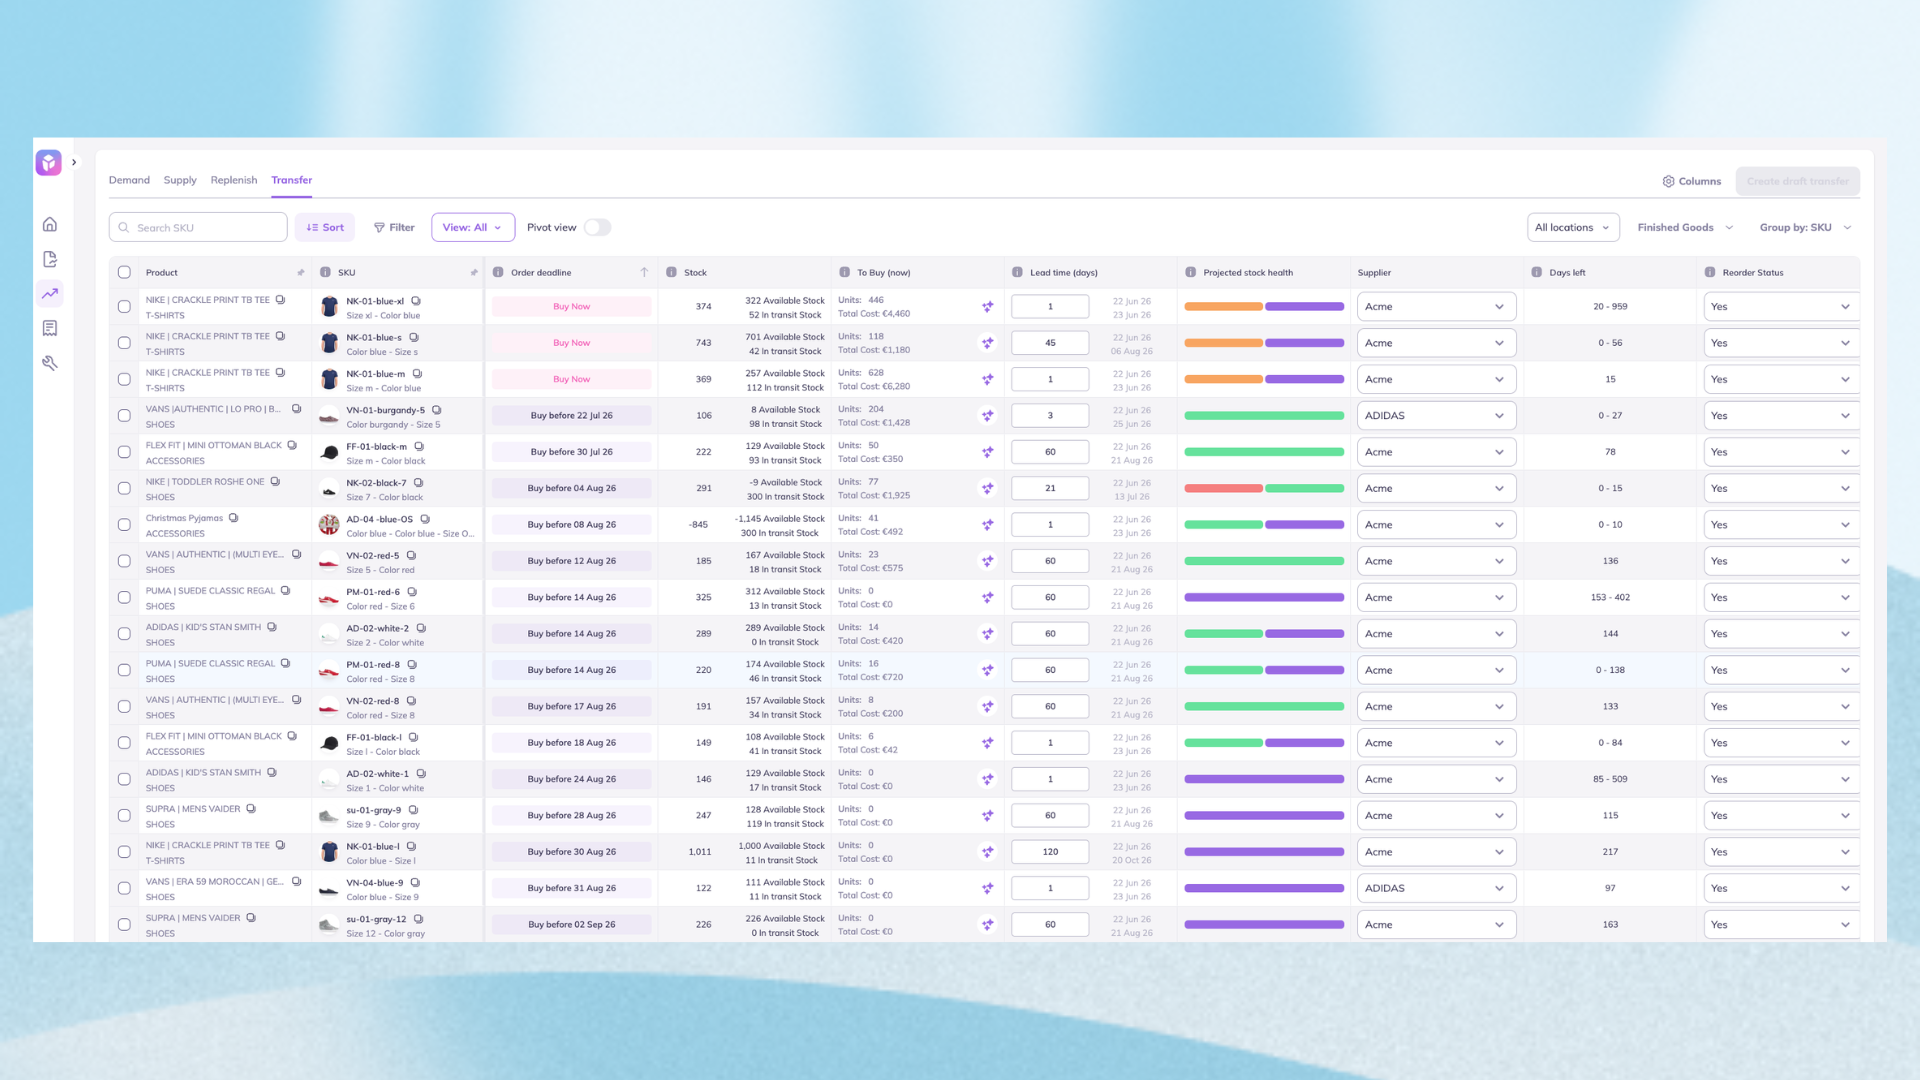
3. Location-specific demand forecasting
Different stores have different demand patterns. A sneaker that moves fast in one city might barely sell in another. Prediko's AI demand forecasting accounts for location-level seasonality and trends, so your transfer decisions are based on actual data.
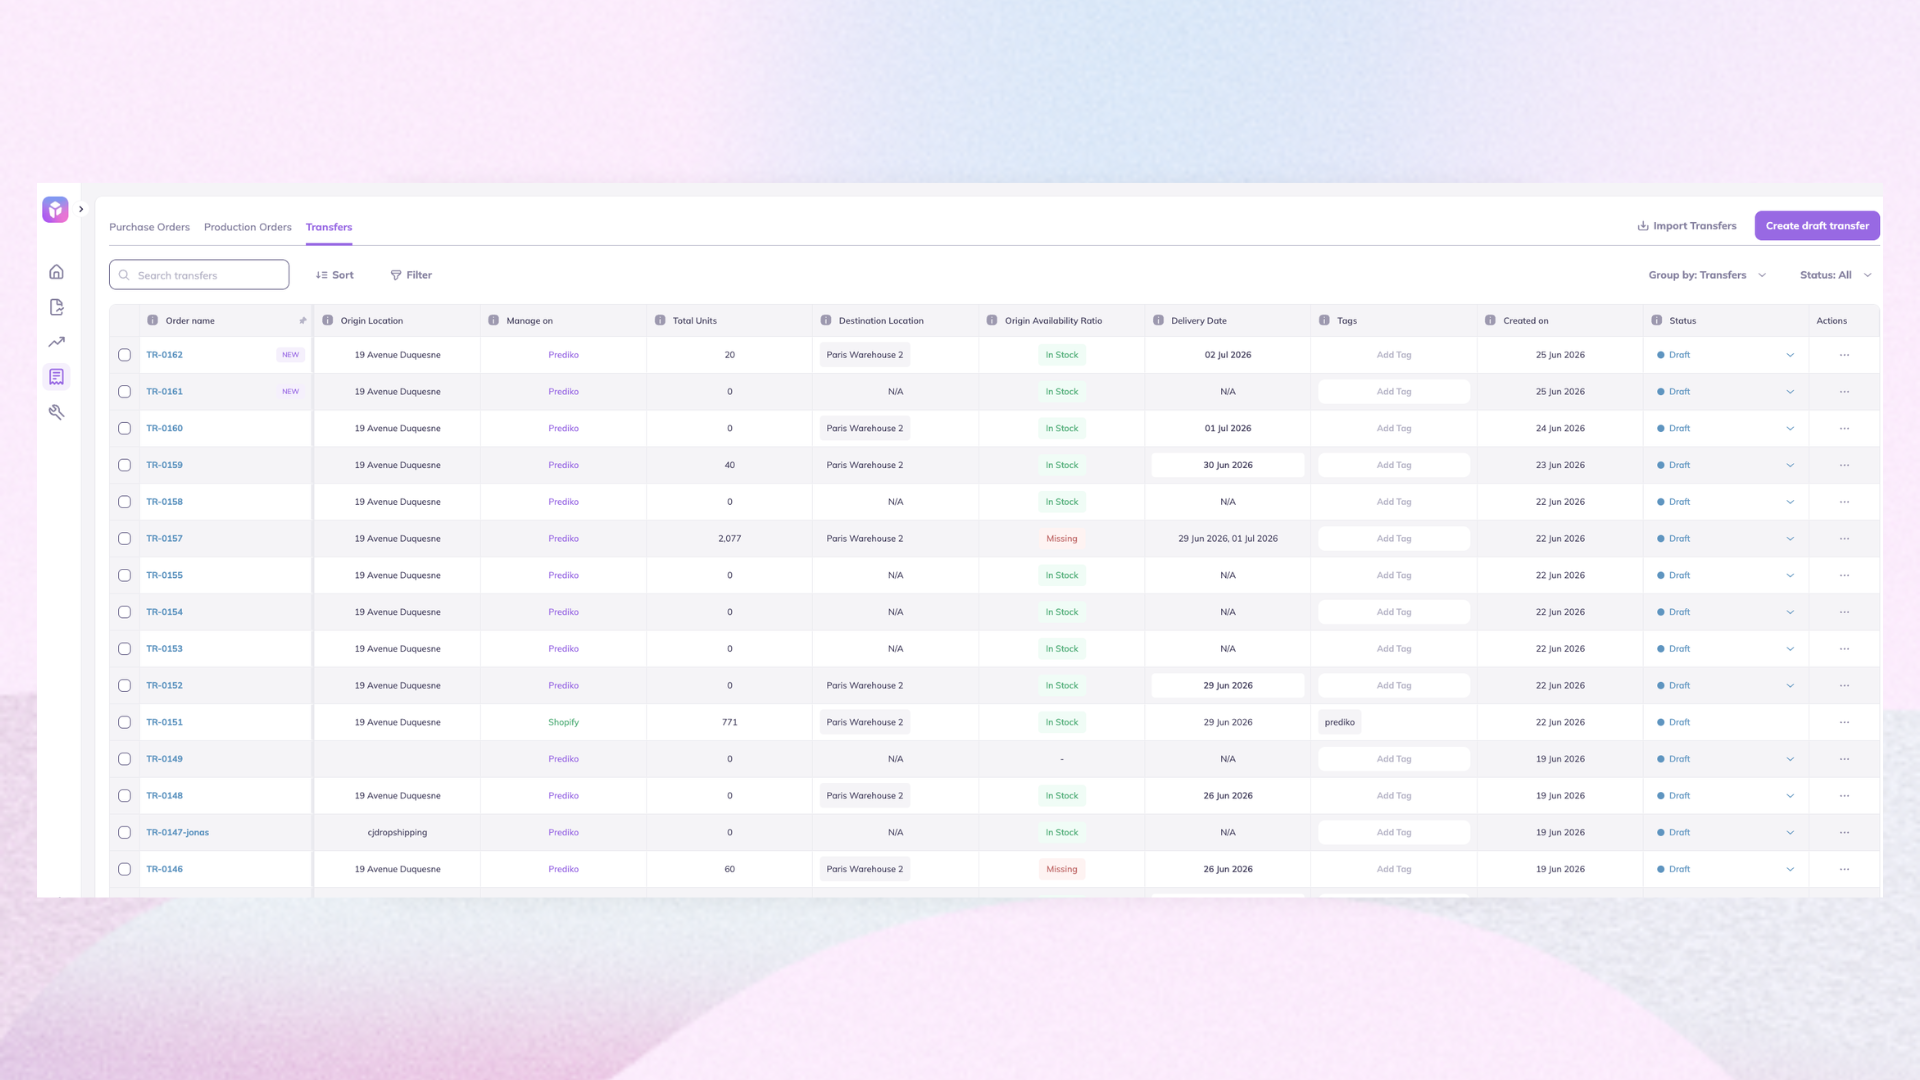
4. Create transfers without switching tools
Once you've identified what to move, you can initiate the transfer directly within Prediko. It syncs to Shopify, so you're not constantly hopping between tools.
5. Replenishment alerts before it's too late
Prediko sends low-stock alerts per location so your team can trigger a transfer (or raise a PO) before customers hit a stockout page. Early warnings help retain
In short: Shopify handles the logistics of the transfer. Prediko handles the intelligence behind it.
🎉 Update: We have recently launched transfers in Prediko. You can easily manage stock movements proactively across warehouses and stores without the spreadsheet.
Use Prediko to Know What to Transfer and When
Managing inventory across multiple locations has always been one of the messiest parts of running a retail or hybrid ecommerce business.
The new Shopify POS inventory transfer feature doesn't solve all of it, but it removes a lot of the friction that made transfers feel like a chore.
The one piece that's still missing from Shopify's native toolkit is the intelligence layer: knowing which transfers to make before a stockout forces your hand.
That’s the gap Prediko built with Shopify through its inventory transfer feature, helping brands move stock proactively before it becomes a problem.
Want to see how Prediko can help you get ahead of stock imbalances across your locations? Start a free 14-day trial.
Frequently Asked Questions
Do I need Shopify POS Pro to use inventory transfers?
Yes. Both the origin and destination locations need to be on the POS Pro subscription to fulfill and receive transfers in the Shopify POS app. POS Lite only supports basic inventory tracking.
Can I create a transfer directly in Shopify POS?
No. Transfers must be created in Shopify Admin under Products > Transfers. Once created, store staff can use POS to fulfill (send) and receive them, but the initial setup always happens in Admin.
What happened to Stocky transfers?
Stocky's transfer functionality moved to Shopify Admin in May 2025. Existing eligible transfers were automatically migrated. Stocky will stop working entirely on August 31, 2026. You should switch to the native Shopify transfers experience now to avoid disruption.
Can I receive a partial shipment and come back for the rest later?
Yes. The new system supports partial receiving. Accept whatever arrived, and the remaining quantities stay in Incoming status. Your team can come back and receive the rest when it arrives. No need to cancel or restart the transfer.
What if I need to transfer stock but don't know how much to move?
That's a planning question, and it's where tools like Prediko come in. Shopify's native transfers handle the operational flow; Prediko gives you the demand forecasting and location-level visibility to make the right call on quantities before you move anything.
Can I use CSV to bulk-create transfers?
Yes. Shopify Admin supports CSV upload to create inventory transfers in bulk. This is useful for high-volume brands moving large amounts of stock across many locations at once.
Will transferred inventory be sellable at the destination immediately?
Once your staff accepts the inventory in POS, stock levels update in real time. However, the product also needs to be activated at the destination location in Shopify Admin to appear in search and be available for sale or fulfillment there.