Shopify Inventory Manual
.avif)
How to Bundle Products on Shopify
A step-by-step guide on how to bundle products on Shopify, covering bundle types, setup methods, inventory tracking, and common pitfalls.
Shopify supports selling product bundles; sets of two or more related products sold together as a single item.
Bundling products can increase the store’s average order value and help customers discover complementary items
Shopify doesn’t provide a built‑in bundle type; instead, you need to install Shopify’s free Bundles app or a third-party solution like Prediko.
Step 1: To get started, you need to determine the bundle type and eligibility
Note: Stores using the checkout.liquid customizations are incompatible with product bundles.
Step 2: Install the Shopify Bundles app from your Shopify admin:
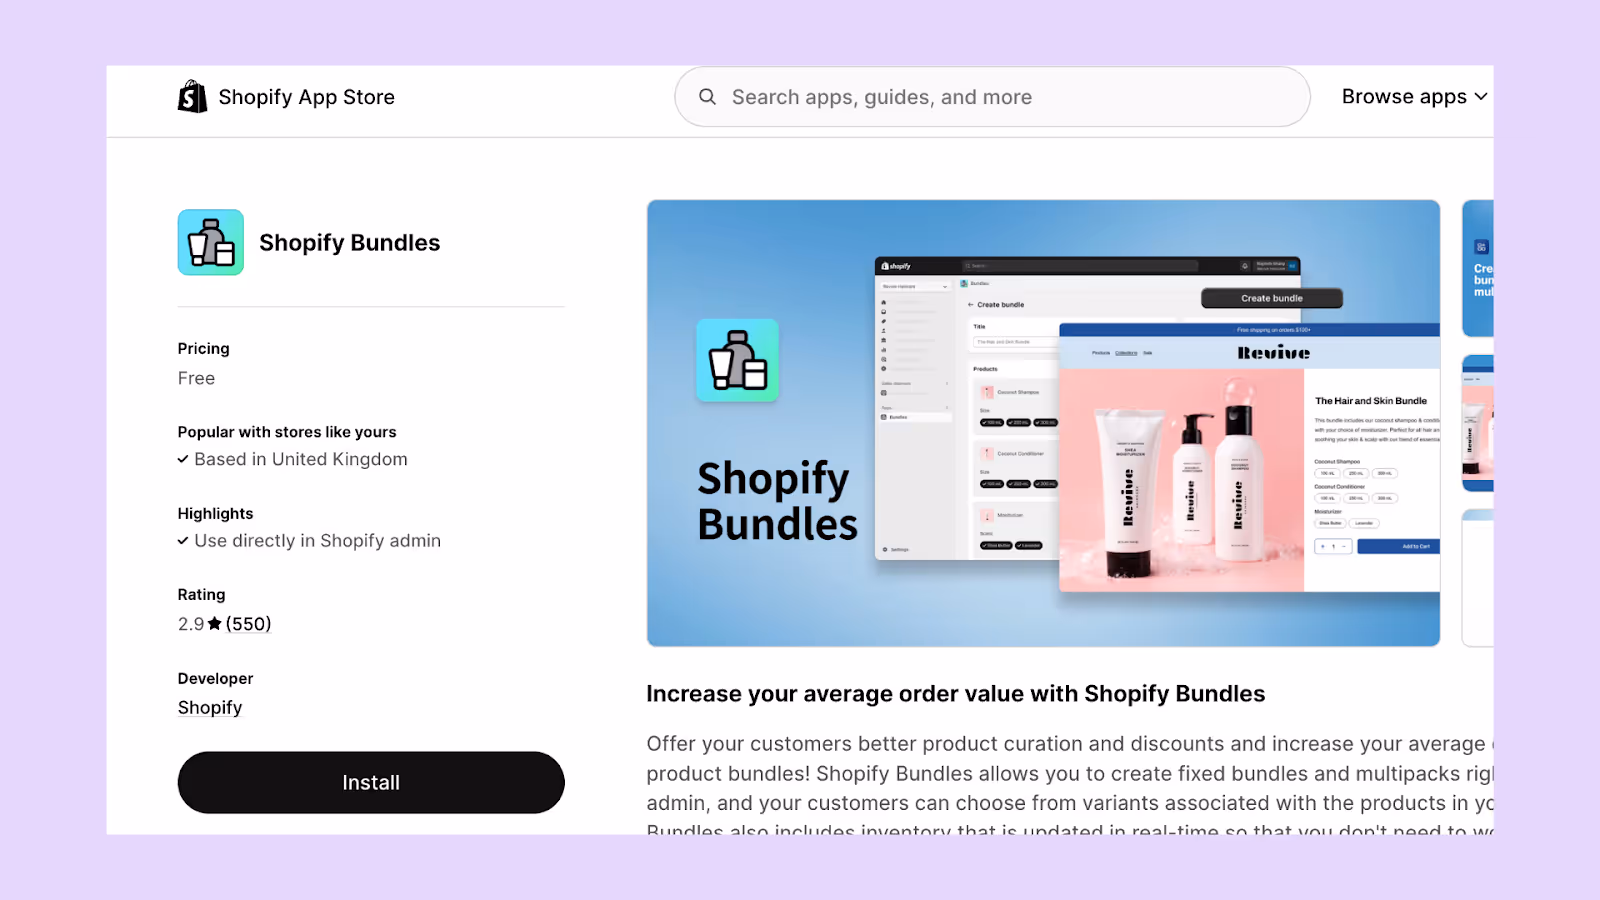
- In Shopify Admin, go to Apps and search for “Bundles.”
- Select the free app by Shopify and click Install.
- Approve the required permissions (if prompted)
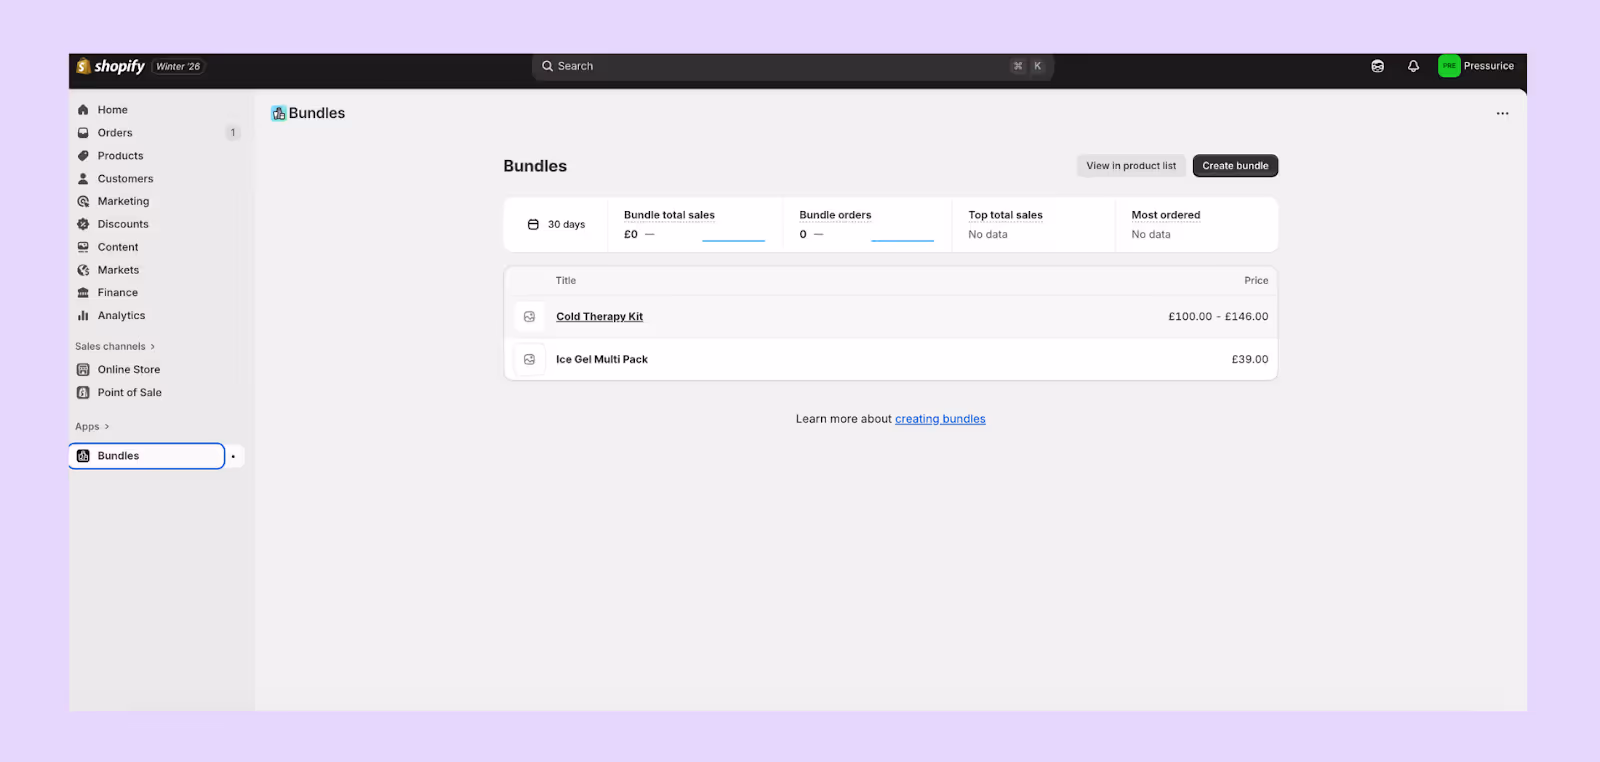
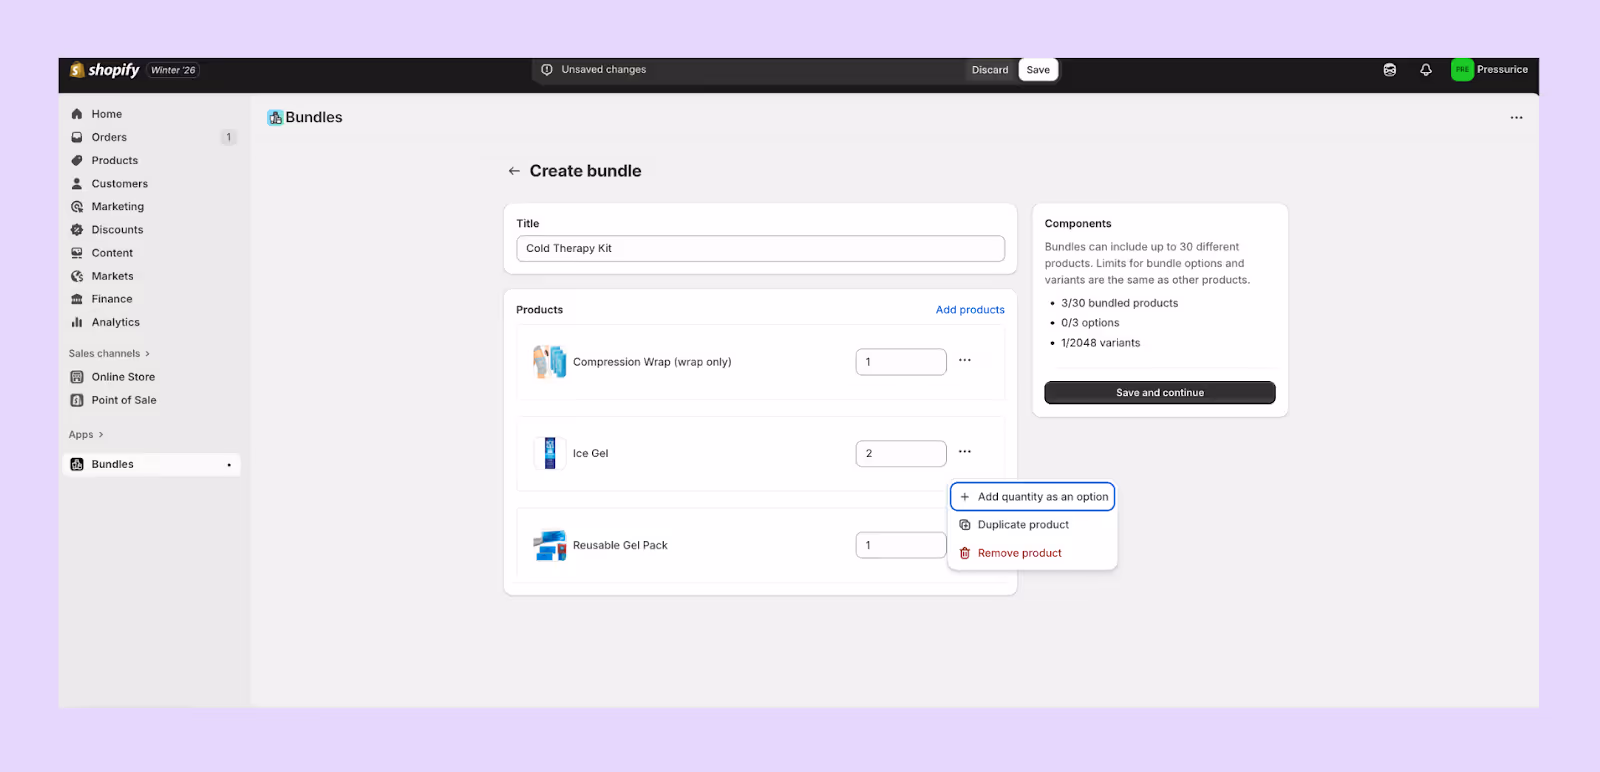
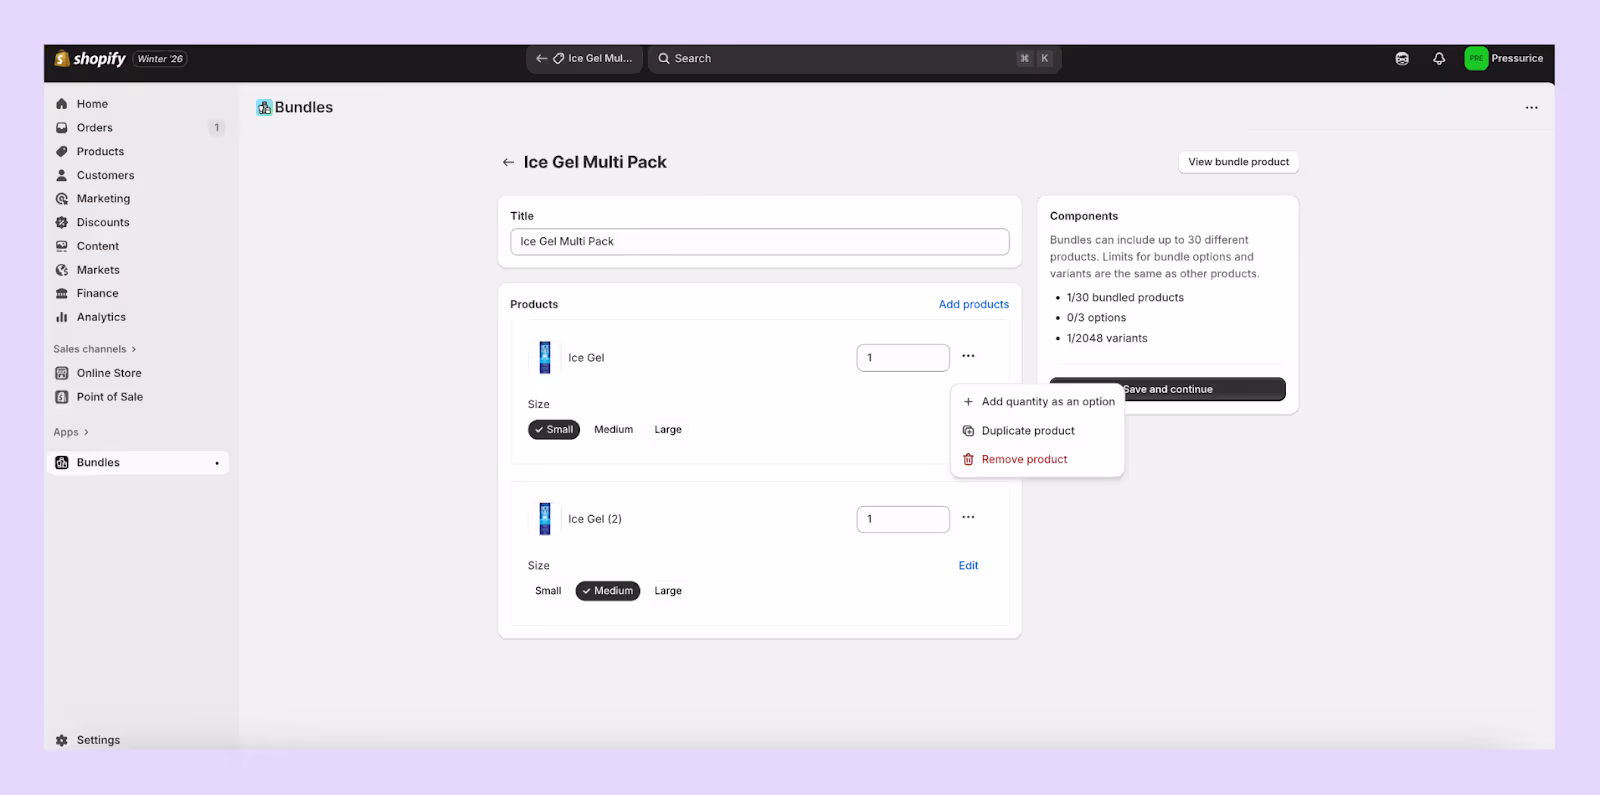
Step 3: Create a product bundle using the Shopify Bundles app
Before creating a bundle, you must create the individual products and variants that will be included
- Open the Bundles app and click Create bundle
- Enter a descriptive title for your bundle
- Select the products and variants to include in the bundle
- Adjust the quantity of each product as needed
- Save and add product details like images, descriptions, price, and SEO metadata
- Choose the sales channels where the bundle will be available (Online Store, Shop, POS)
- Change the product status from Draft to Active to publish the bundle
- Click Save to finalize
How to edit an existing bundle?
You can easily modify bundles directly in the Bundles app. Simply, select the bundle you want to edit.
Make your changes (images, descriptions, quantities, options) and click Save and continue to return to the bundle product page.
Tip: If component or inventory values aren’t updating, temporarily increase a component’s quantity and save. This forces Shopify to re-sync the bundle’s inventory.
How to manage and filter bundle products in your product list?
Bundles are created as distinct products in your Shopify admin. You can manage them like other products, including editing details from the Products page.
To filter and organize your product list, such as a view showing only bundles, you can create custom views (built‑in filtering feature)
- From your Shopify admin, go to Products
- In the views list, click the + icon to create a new view
- Give the view a name (e.g., “Bundles Only”) and click Create view
- Use search and filter features to display only products that meet your criteria (e.g., filtering by Product type if you use a type like “Bundle”)
- Click Save to add the view as a tab
This custom view helps you quickly find and manage bundles, especially when performing bulk actions.
Important Settings to Note When Setting Up Bundles
- To let customers choose the pack size (e.g., a 3-pack or 5-pack), enable “Add quantity as an option.” This gives buyers a simple dropdown to select how many units they want, making the bundle more flexible and increasing average order value.
- If multiple products share an option (e.g., Size), you can merge them by selecting “Combine options with matching names.” Customers only choose the option once, creating a cleaner buying experience. To ungroup them, just deselect the option and save.
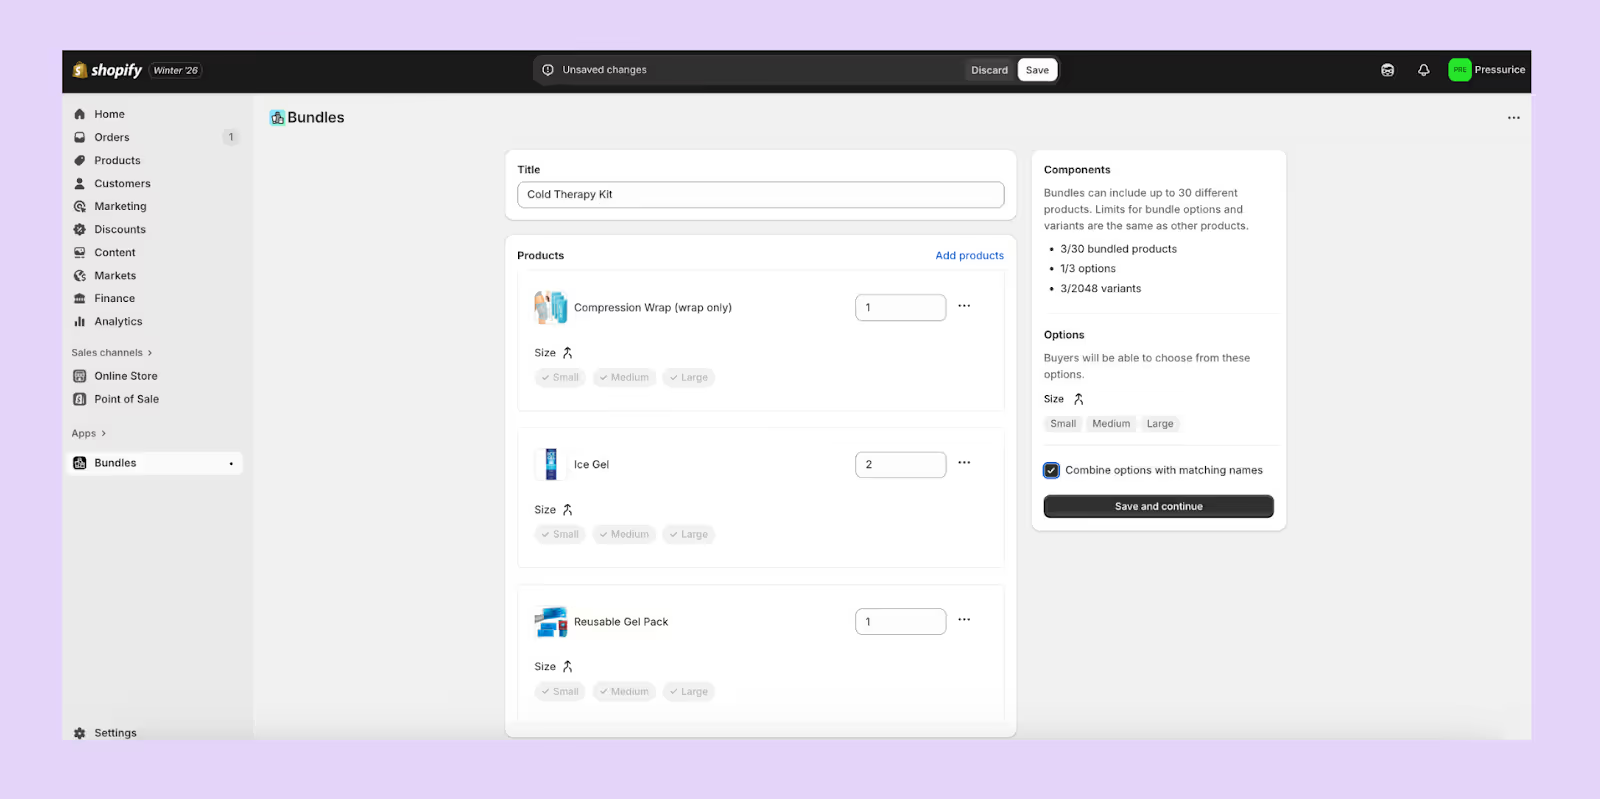
- For multipacks, add the same product multiple times or use “Duplicate product” to quickly create additional units. This makes it easy to build 2-packs, 3-packs, or larger bundles without manual repetition.
Note: If you don’t want to use the native Shopify Bundles app or prefer more advanced control, you can switch to third-party solutions like Prediko, which also support bundle-level forecasting.
Best Shopify Bundle Apps to Try
Shopify's native Bundles app handles the basics, but if you need more flexibility ,mix-and-match logic, volume discounts, BOGO layering, or stronger analytics , a dedicated third-party bundle app is the way to go. Here are three top-rated options worth trying.
1. BOGOS
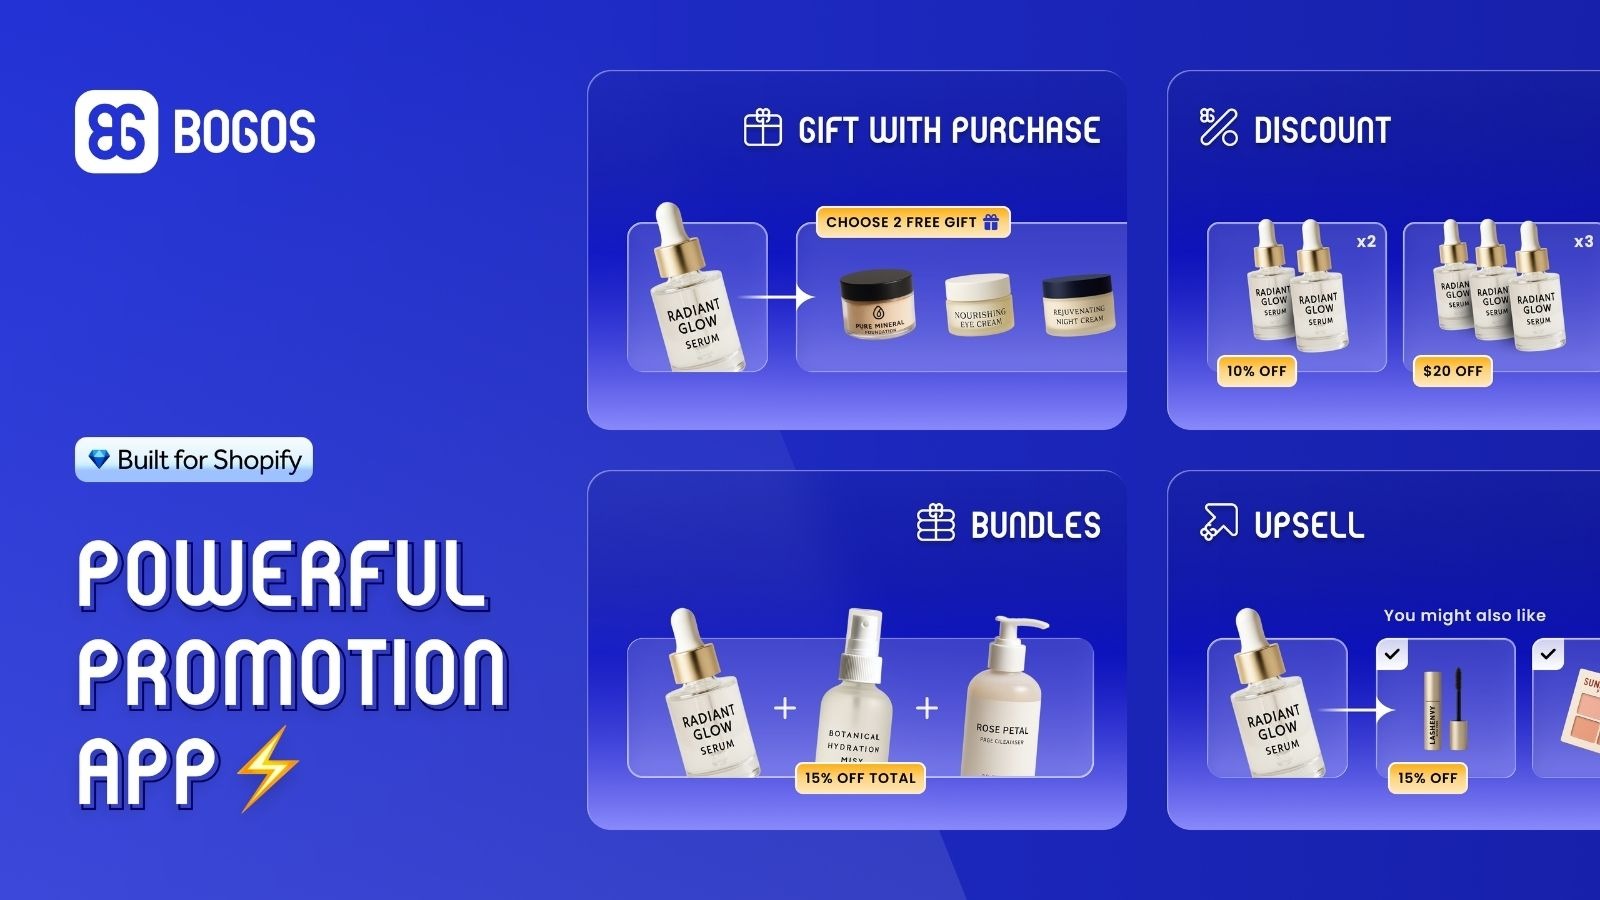
- Rating & Reviews: 5.0 ⭐ / 3,400+ reviews
- Pricing: 30 lifetime free orders. Paid plans start from $29.99/month
BOGOS is a top-trusted Shopify promotion app with a 5-star rating and over 3,400 reviews. It combines product bundling with free gifts with purchase, upsells, and discounts all in a single tool.
- Multiple bundle types: Fixed bundles, mix-and-match sets, and a dedicated bundle builder page where customers assemble their own packs.
- Intuitive and fully customizable widget: Professionally designed, no-code bundle displays that match your store's branding — adjust colors, layouts, and placement without touching theme code.
- Flexible discount types: Percentage off, fixed amount off, set price, free gift, and free shipping. Tiered discounts are also available for custom volume bundles with escalating savings.
- Precise audience targeting: Narrow your offers using sub-conditions like specific URLs, customer order history, customer tags, geolocation, or Shopify market.
- Stacks with other offer types: Layer bundles alongside checkout upsells, frequently bought together, and thank-you page offers from the same app.
- Real-time inventory sync, analytics, and A/B testing: Track revenue and conversion impact while Shopify inventory updates automatically in the background.
- Multi-language and multi-channel support: Built-in translation, POS and headless compatibility, and API access for selling across channels.
Rating & Reviews: 5.0 ⭐ / 3,400+ reviews Pricing: 30 lifetime free orders. Paid plans start from $29.99/month.
Best for: Merchants who want one app to handle bundles, upsells, free gifts, and volume discounts — without juggling multiple tools.
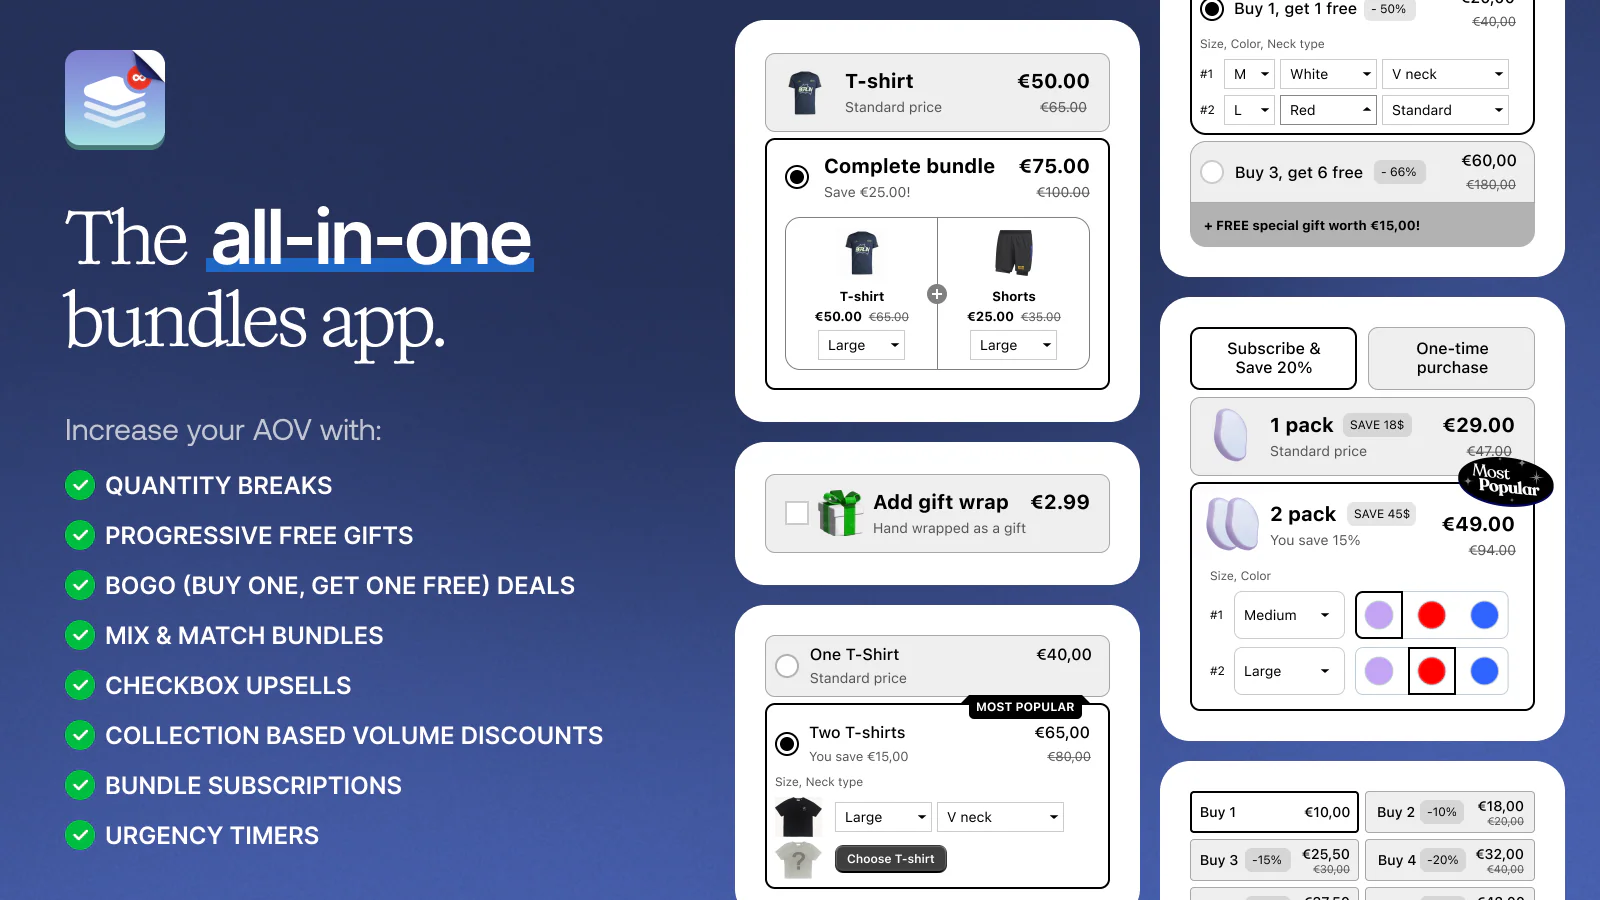
2. Kaching Bundle Quantity Breaks
- Rating & Reviews: 5.0 ⭐ / 3,900+ reviews
- Pricing: Start from $14.99/month
Kaching focuses on quantity-based bundle deals displayed directly on product pages. It uses Shopify Functions instead of draft orders or discount codes, which means a cleaner checkout experience for customers. It carries the "Built for Shopify" badge.
- Tiered pricing widgets: Create offers like "Buy 2, Save 10%" or "5 for $30" with an on-brand widget that sits right on the product page.
- Full design customization: Adjust colors, styling, and layouts to blend seamlessly with your theme.
- Built-in A/B testing: Test different bundle configurations to find what converts best.
- Revenue tracking dashboard: Monitor exactly how much additional revenue your bundles generate.
- Multi-language support: Serve international customers in English, French, German, Spanish, Italian, Dutch, and Swedish.
Rating & Reviews: 5.0 ⭐ / 3,900+ reviews Pricing: Free to install. Paid plans start from $14.99/month with a free trial available.
Best for: Stores that rely on volume-based pricing and want a lightweight, conversion-focused bundle widget with minimal setup.
3. Bundler ‑ Product Bundles

- Rating & Reviews: 4.9 ⭐ / 2,000+ reviews
- Pricing: Free plan available. Paid plans start from $9.99/month.
Bundler is a budget-friendly option that covers a wide range of bundle types and integrates with subscription products for recurring revenue. It offers one of the most generous free plans among bundle apps.
- Broad bundle types: Classic bundles, mix-and-match, quantity breaks, BXGY, tiered discounts, and subscription bundles.
- Bundle landing pages and shortcodes: Promote specific bundles across your store — not just on product pages.
- Popup display format: Show bundle offers in a popup in addition to standard inline widgets.
- Flexible discount logic: Set discounts as a percentage, fixed amount, or specific price per bundle.
- Subscription integration: Pair bundles with recurring orders to drive long-term customer value.
Rating & Reviews: 4.9 ⭐ / 2,000+ reviews Pricing: Free plan available. Paid plans start from $9.99/month.
Best for: Merchants looking for a low-cost entry into bundling with flexible offer types and the ability to create dedicated bundle landing pages.
.avif)
What’s the Difference Between Products and Variants on Shopify?
Not sure whether your item should be a product or a variant on Shopify? This guide explains both.
Shopify treats products and variants differently. When you add a new item to your store, Shopify automatically creates one variant of that item.
Every product must have at least one variant, because variants represent the actual version of the product that customers purchase.
In other words, the product acts as the parent container while each variant is a child item with its own specific characteristics.
- Products: A product is the overarching item that you sell. It contains general information such as the title, description, brand, product type and collection. Products can have multiple variants, but some products consist of only a single variant (the default variant).
- Variants: A variant is a specific configuration of a product created by combining the product’s option values (e.g., size = small, color = blue). When a product comes in different sizes, colours or other attributes, each unique combination is a variant.
Note: Shopify lets you add up to three option types (such as size, colour or material) per product and supports up to 2,048 variants per product.
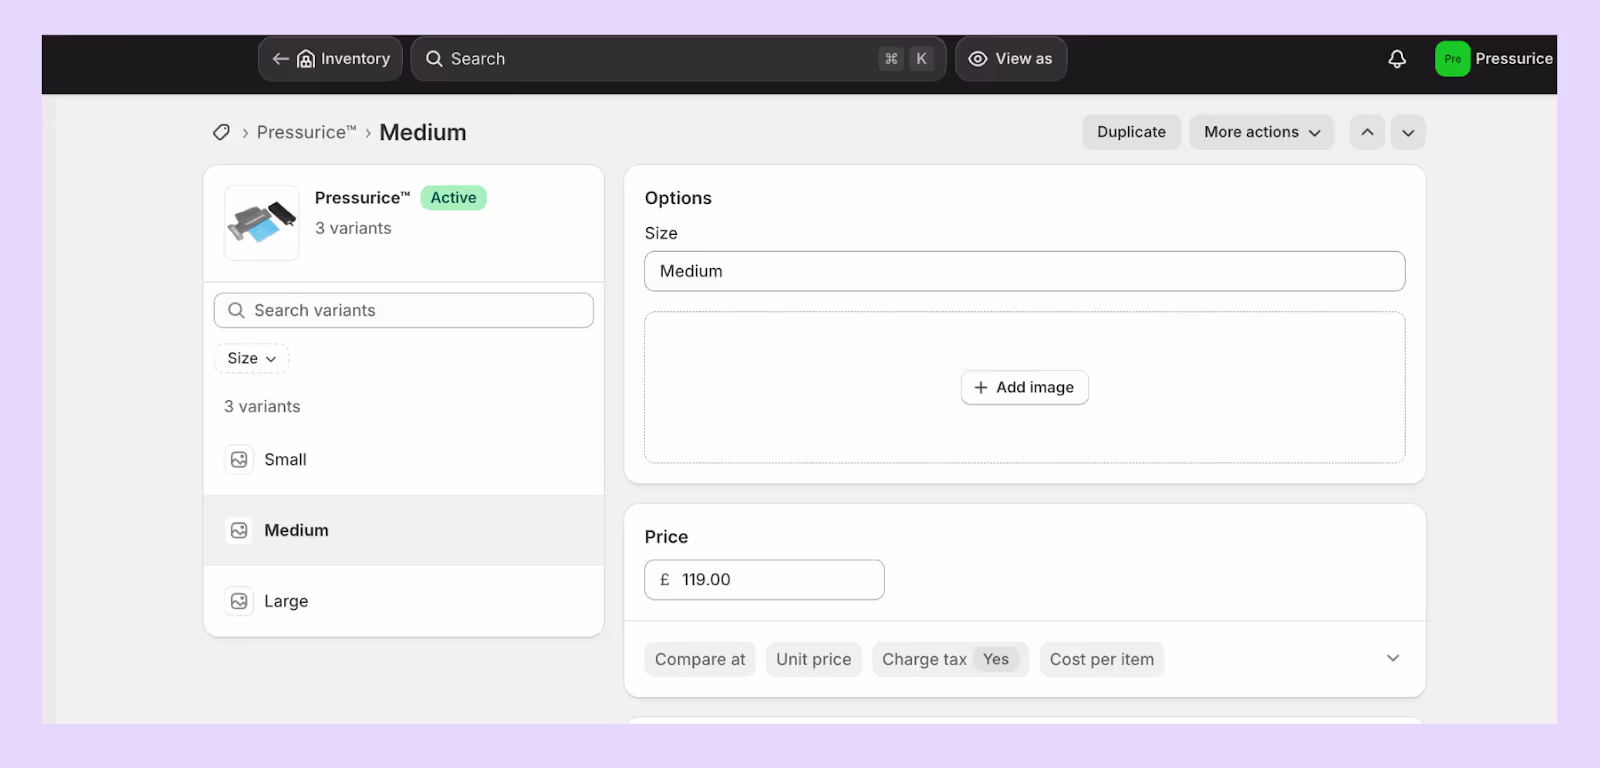
Each variant has its own details (such as price, inventory quantity, weight and SKU) that you manage on the variant details page rather than on the product page
Options vs. variants
- Options are attributes of a product, for example, size, colour or material. They define how a product can vary, but by themselves, they don't represent something you can sell. A product can have up to three options.
- Variants are the purchasable versions of the product created from option combinations. Each combination of option values becomes a variant
For example, a T‑shirt with options for size (small, medium, large) and colour (blue, green) has six variants: small‑blue, small‑green, medium‑blue, medium‑green, and so on.
Each variant can have its own price and inventory
What stays at the product level?
The product record stores information that applies to all variants
How is inventory tracked?
Because product records do not include inventory quantities, you cannot track stock at the product level.
When a product has no variants, you set its price, inventory and shipping on the product details page; but once variants are added, you must adjust those settings for each variant.
Inventory is therefore tracked at the variant level
What stays at the variant level?
Variants hold information about each specific version of the product
Important things to note
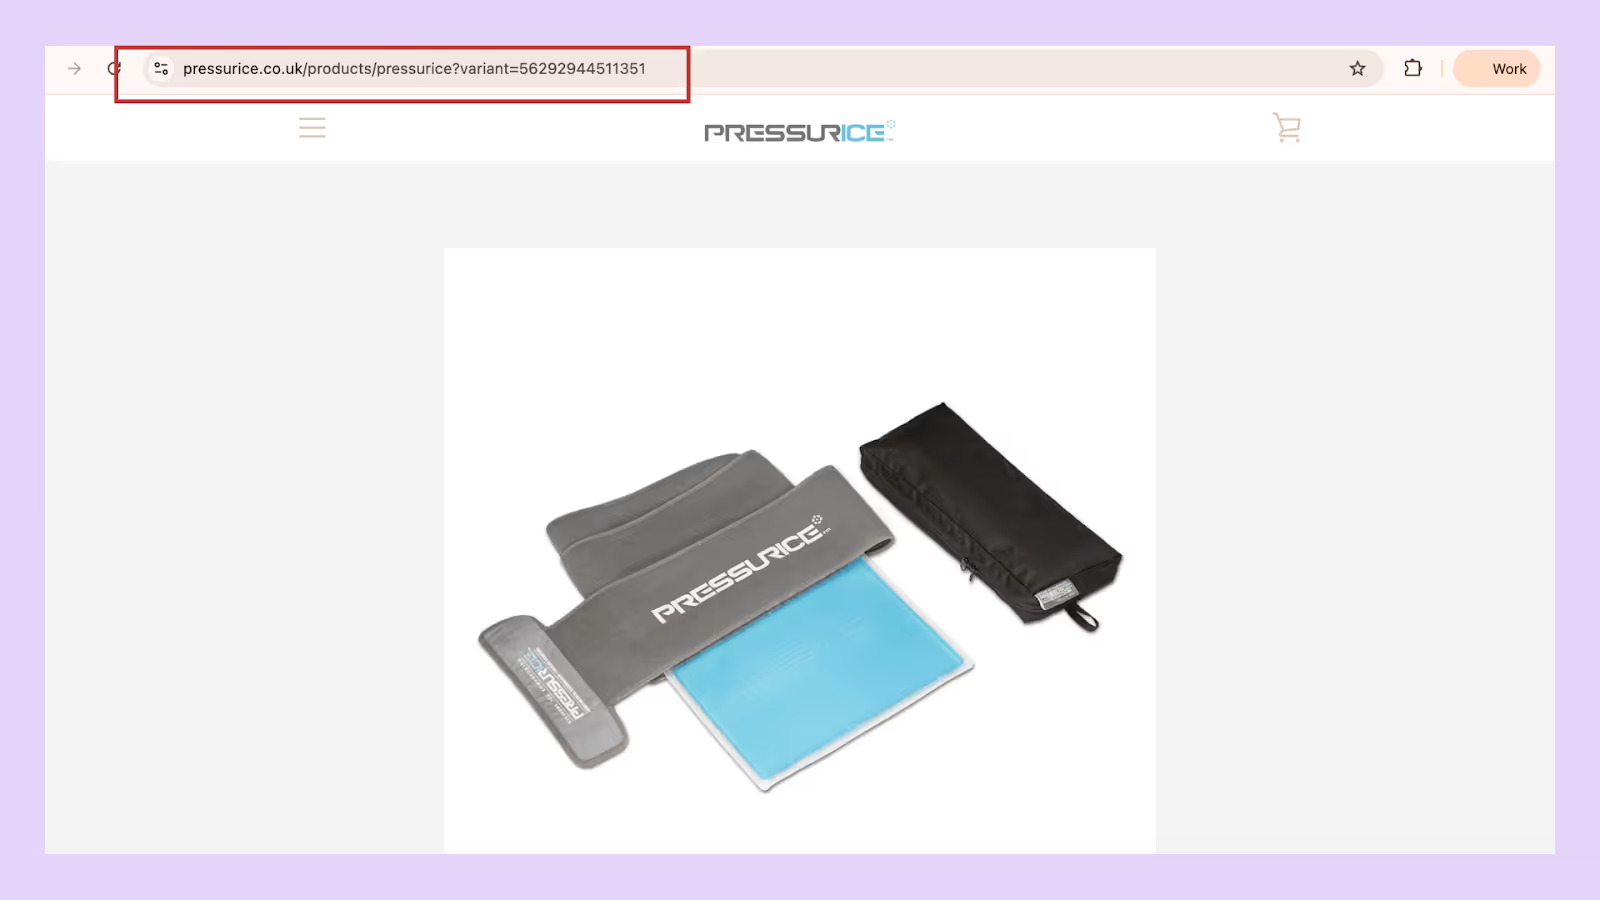
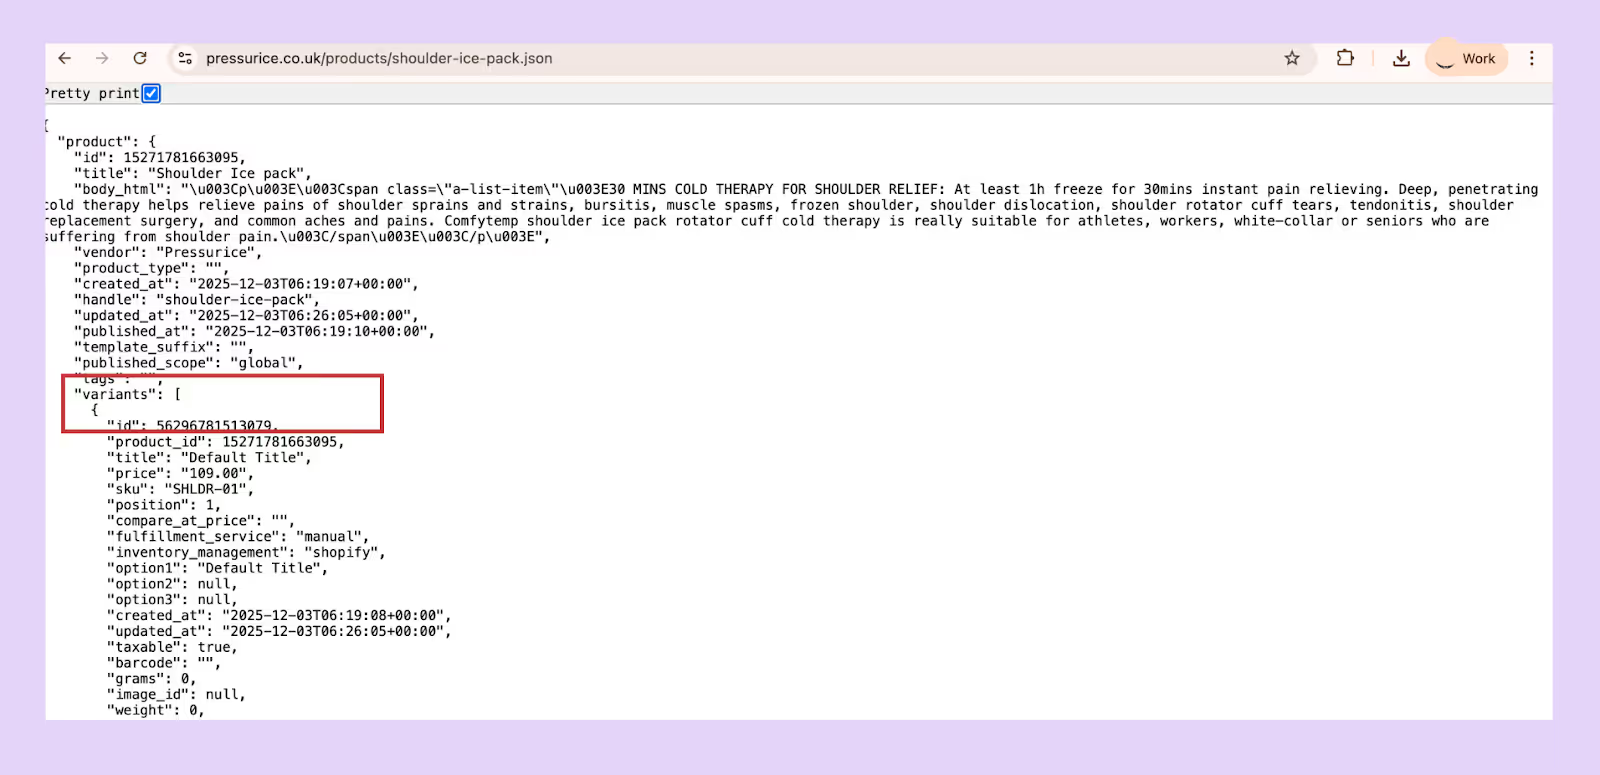
A product ID identifies the parent product in Shopify’s database, while each variant has its own variant ID. You can find a variant’s ID by clicking the variant in the product details page and looking at the URL – the number after /variants/ is the variant ID.
Products without variants still have a default variant ID that can be viewed by appending .json to the product URL and looking for the "variants" → "id" value
Understanding these identifiers is important when working with CSV imports or API integrations.
Best Practices When Defining Products and Variants
A clear product–variant structure keeps your store organised and your inventory clean. These best practices will help you avoid common setup mistakes.
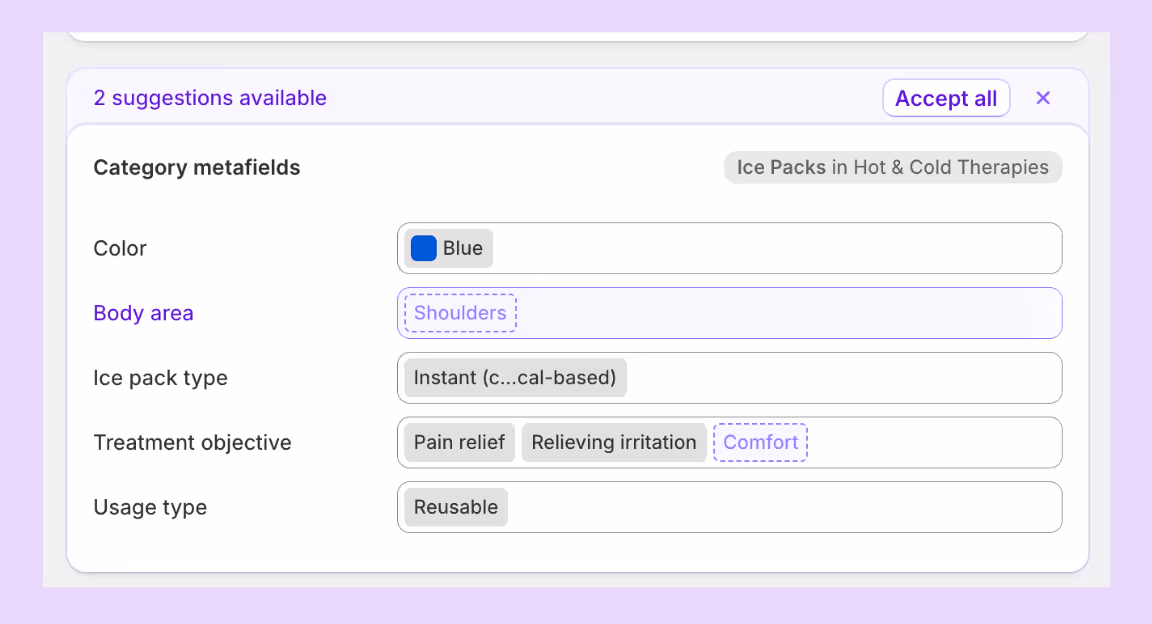
1. Use category metafields for consistent option values
Category metafields let you create reusable option lists (like a master colour list) so your option names stay consistent across products. If you update an entry (say “Cyan” to “Blue”), Shopify automatically updates it everywhere that metafield is used.
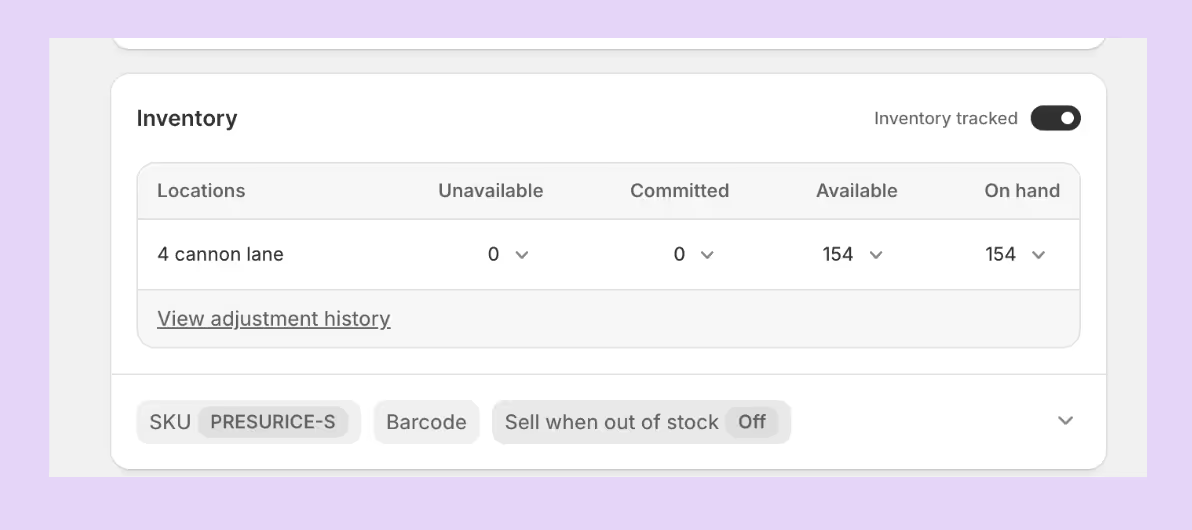
2. Turn on inventory tracking and add quantities
Open your product in Shopify, click each variant, and in the Inventory section, enable Track quantity and enter the starting stock. Repeat for every variant. You can update quantities one by one or use the bulk editor/CSV to do it faster.
3. Use descriptive SKUs
Design SKUs so you can identify the product, variant options and even location at a glance. This makes stock reconciliation easier and helps when importing or updating inventory via CSV.
4. Capture custom data with metafields
Use variant metafields to store specialized information such as manufacturing details or internal notes. Variant metafields can be created on the variant details page, but they aren’t displayed to customers.